Showing posts with label embossing. Show all posts

Thursday, May 2, 2013

A Mother's Day card

Hi again!

Here to share another card I made tonight for Mother's Day. If you head over to V's Sweet Ideas, you'll see this is the latest challenge over there and with Mother's Day right around the corner--it's a perfect time to play along! Also, there's a color challenge at Inkspirational AND A Blog Named Hero challenged us to use glitter, bling, etc on our card. That's right--three challenges in one! :) You'll find my card and the challenge badges below:

Let me begin by saying that, for those that have been seeing my cards these past couple of weeks, yes, I am using a lot of embossed cards right now. I took my cuttlebug on vacation with me and embossed tons of cardstock so that I could come back and finish the cards any way I wanted. And I still have a lot of embossed cardstock so don't be surprised if you keep seeing different variations for the next few months! :) Although, truth be told, it's a great way to get some prep work done beforehand.

Now, for this particular card I used shaded lilac distress ink and added some dusty concord to the edges of the sentiment, too. The color is a very soft purple color. I wanted to use a darker purple for the butterfly and used a Martha Stewart punch for the butterfly and added some bling to it. I also added some gems to the center of the flowers and also used my glitter pen on the smaller flowers. It's hard to see in the picture but you can see it a bit on the flowers towards the top of the card. Looks really nice in life real. I also wanted the butterfly to appear as if it was on a fence so I used the Hero Arts Lattice stamp and placed that behind the butterfly. I added some ribbon, the sentiment, some stitching and we were done.

Thanks for stopping by!
Pat

A runway-inspired baby card

Hi friends!

I'm so excited to share a card I made late last night with you. It's for the Runway Inspired site and it challenged us to be inspired by a photo and make a baby card. Here's the photo and my card:

I had been looking for a baby stamp set for a long time! And last week I stopped by Michaels and they had just put this Inkadinkadoo stamp set on clearance...$3.99 and no sales tax! I was thrilled! I was dying to use it so when I saw the challenge for the week, I jumped at it! I wanted to use my swiss dots embossing folder to mirror the dots the little girl had on her dress. And the grey/black she's wearing is on the card base and the insert behind the main image. I added a ribbon that says "it's a girl" and used the stamps from the "welcome baby" set. I colored in the cute little dog with my inktense pencils. They didn't have a really light pink so I just kept watering down the color I had and it worked! I added a few gems and the card was done. Such a fun card!

Thanks for stopping by!
Pat

Thursday, December 1, 2011

MOJO 217

Yes, I am posting twice in a matter of minutes! :)

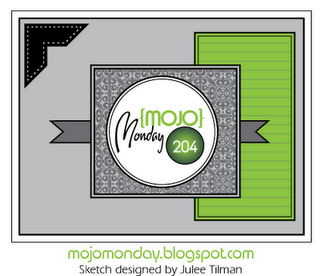
It's been weeks since I've had a chance to play along with the Mojo Monday site. I saw this sketch earlier in the week, though, and really wanted to try it out. Here it is:


I decided to rotate the sketch and use the square version. Here's my card:
I started out by embossing the blue cardstock with a snowflake embossing folder with the cuttlebug. I knew I wanted to add some dimension, though, to the embossing so I used a faux letterpress technique and inked one side of the folder with white ink. That gave the background more of a snowy, midnight feel. I stamped the bears in a brown pigment ink and they're from a stampin' up set from years ago. I heat embossed the image and then colored it in using some glaze pens. I LOVE the wet, glossy feel of the image. I then cut it out using a spellbinders label and lightly inked a bit of broken china distress ink around the edges. I then used 2 strips of turquoise paper and freehanded the sentiment in white ink. I added a snowflake and then added some faux stitching around the strips. I added some stickles on some of the snowflakes and on one of the bear's earmuffs. Done! :)

There's still some time to join the mojo site this week... :)

Have a great weekend everyone!

Sunday, October 9, 2011

CPS 239 and Lawnscaping 19 Challenge

Hi everyone!

Hope everyone is enjoying their Sunday! I'm actually home alone--which means I get to play in my room! :) My men are off at our church's apple festival and, since I'm recuperating from a pneumonia bout, I'm home resting (and playing a bit, too!).

There's a couple of challenges I had hoped to sink my inky fingers into. The first was a sketch challenge from CPS. Here's the great sketch!


The other challenge had been posted for a bit but I'd been too sick to play along..til today! :) Lawnscaping's challenge was to do some layering/dimension elements on your card. Here's the official pic of the challenge.


The sketch lends itself to some dimension so it was great to incorporate both into my card. Here it is:
I started out with kraft-colored cardstock that I inked up using vintage photo distress ink. I then used 2 strips of KI Memories pattern paper that I cut using an old Creative Memories wave cutter. I punched out 2 circles--one in white and one in teal. The white circle I decided to use the script Cuttlebug embossing folder and add some dimension to the circle. The card kindda reminds me of going to the beach and the script seemed to remind me of writing in the sand. I changed the color of the circle, though, and used shabby shutters distress ink to have it give some more color to the card. When I started assembling the card, I kept thinking the brown background needed something. So, I took my "happy" definition stamp from Hero Arts and stamped it in vintage photo. Just wanted a subtle pattern in the background. I adhered the strips of pattern paper and the circles. But it was missing something...so I grabbed some pearls and that made me happy! :) I used a spellbinders label for the sentiment die cut and then stamped Happy Birthday in vintage photo ink.

LOVED the sketch! Hope you can play along!
Pat

Sunday, October 2, 2011

Wee Memories Challenge 70 and CFC 22

Hi everyone!

I hope everyone had a good time this weekend making some cards! Although, technically, the weekend isn't over but I know many enjoyed World Cardmaking Day yesterday. I was busy almost all day but did make a quick card last night and decided to use these 2 challenges to enhance the fun!

The first challenge was from CAS-ual Fridays. Here's the challenge pic.
I knew I had some ribbon that had some loops on it and I hope this counts! :)


Over on the Wee Memories site, the challenge is basically to do whatever technique is your favorite. That's easy for me--I know it's gonna have some embossing on it! :)

So, here's my card.

It's a smaller card--I think it's 4.25x4.25. I started out with some light blue textured cardstock and embossed it with the swiss dots embossing folder from Cuttlebug. Then, I used my spellbinders label (#8, I think?) to cut out the white panel. I knew it'd be a baby card so I used an old Fiskars texture plate and used that to emboss the little hands and feet on the white panel. Unfortunately, the picture doesn't pick it up much. Then, I took some of the baby blue ribbon w/the baby bib loops and added it to the white panel. Added 2 buttons w/twine knotted through and the sentiment is on the inside. Quick card--but fun! :)

Hope you guys can play along, too!
Pat

Thursday, September 29, 2011

White + One PaperPlay challenge

Well, I contemplated going to bed early...but apparently making a card was way more fun! :) Who needs sleep?!

I was looking through a new challenge site--PaperPlay--and I thought their challenge was great! I stumbled on their site but I think I'll enjoy playing along here a lot! This week's challenge was to make a card with the color white plus one more color.

I don't know if this happens to everyone at one time or another but I knew EXACTLY what I would do for this challenge. I love it when that happens! I knew the colors, I knew the ink, I knew the ribbon, I was ready to go! Maybe that's why I postponed my bedtime--I knew exactly what I'd be doing and I knew it'd be quick! :)

Here's my card:

I used a Sizzix embossing folder but only embossed 2/3 of it and then mounted it on teal colored paper. I knew I had a satin ribbon that matched it and then realized that the broken china distress ink is also pretty close in color. I stamped the sentiment and added a few pearls and the card was done! Although the card is super easy, I LOVE these kinds of cards...they're quick and elegant-looking cards...

Thanks for stopping by...and now I really am off to bed! :)

Saturday, September 10, 2011

Wee Memories Challenge 67

Hi all!

It's been a super busy week for us so this is the first chance I've had to play! :( But, I was able to work on some cards for our church tonight and that's something I really enjoy doing. Our pastor sends every member a "Happy b-day" card that's handmade. (Actually, this time I had to make him several sympathy cards and I finished both batches tonight). We have a team that work on the cards and it was time for me to pitch in. Seeing that many, many cards have to be made, I knew I needed to keep it VERY simple. And that happens to coincide w/the challenge found here. Hope you can play along this week w/the Wee Memories Challenge!

So, what was the challenge? To create a "one layer" project. No dimensional adhesive--just a clean and simple card. Sounds easy--but it does have its challenges!

Here's one of the cards I made:
I decided to use my Quickutz embossing folder with my cuttlebug and that would give me a nice frame for my sentiment. I stamped the sentiment, which is from Hero Arts, with black soot distress ink. Then, I found some $1 stamps that had some flowers that curved a bit. Perfect! So, I inked those up with pine needles distress ink and then colored in one flower with my glaze pen. It was that simple. I did 5 of them within 30 minutes. For the birthday batch, I easily did another 25 cards and just swapped out the sentiment.

Thanks for stopping by...and as we remember what happened 10 years ago, let's thank those that continue to protect and serve our country.

Sunday, September 4, 2011

Lawnscaping Challenge #17 and Sweet Sunday Sketch Challenge 133

Hello again!

There's nothing more fun than a day of creating cards! Having the day off from laundry and cooking and cleaning...and knowing that I can still play a bit tomorrow, too! Yay! And tonight I lucked out w/a great sketch and my favorite technique in 2 challenges. The card was fun and simple to make! Quick and easy are definitely my style!

So, here are the details to the different challenges: SSSC had a sketch to work off of and you can click here to play and here's the sketch.


Over on the Lawnscaping website, the challenge was to do a card using the embossing technique--dry or heat. You can play along here and here's the details to that challenge.


So, without further ado, here's the card I created for both of these challenges.
I knew I wanted to use a snowman and I knew the cuttlebug embossing folder w/snowflakes would be a perfect combo for it. I quickly embossed the blue cardstock and then sponged some white pigment ink over the whole card. I wanted it to look like it was a bit snowy in the back so I wasn't too particular over how the sponging looked. Then, I stamped my Stampin' Up Snowman in black soot distress ink and punched him out. I then colored in the image w/my glaze pens--including the eyes and the arms. I had a friend lend me a small snowflake punch a few months ago and I punched some extras. Using those extras, I created the border for the card. The top 3 snowflakes also have some diamond stickles on them--just hard to see in the pic. Using the orange glaze pen, I added some dots along the border of the circle punch and then mounted the image w/dimensional adhesive. Using an EK Success border punch, I punched out a strip of cardstock for the handwritten sentiment and used the black glaze pen for "Merry Christmas" and the card was done! EASY!!!! :)

Come play along...Embossing is so much fun and the sketch is great, too!

Happy Labor Day!

Wednesday, August 17, 2011

MOJO 204

Hi all!

Well, I finally sat down and tried my hand at the MOJO sketch for the week. Unfortunately, the card is for a dear friend who has lost a loved one. So, I guess the motivation was high to get the card done and in the mail for her. Can't wait for heaven! No more tears or sorrow!

This was the sketch for the week:

Here's my take on the sketch:

Once I picked out the pattern paper, everything else fell into place for me. The pattern paper is from KI Memories and it's called the Funky Paper Pad II. I then cut a square of textured brown cardstock and mounted that one a white mat. Then, I cut a rectangular piece of the teal colored cardstock and embossed it w/my cuttlebug using the swirls (?) folder. Then I, again, used my cuttlebug to cut out the center panel. LOVE my cuttlebug! Once the paper was all in place, I punched a butterfly out of the teal colored cardstock using a Martha Stewart punch. LOVE this punch! I added some pearls to the butterfly and to the upper left edge of the card. Then took my brown marker and faked some antennae for the butterfly. The sentiment is stamped in pigment ink and is from Hero Arts (C1476).

Thanks for stopping by. If you want to play along, click here.

Tuesday, July 26, 2011

RCC13

It's time to get ready for Christmas! OK, not really...but w/the latest challenge over on the ribbon carousel blog, I was inspired to go w/a Christmas card! It's my first time participating in this challenge and I knew which card direction to go...

The challenge: basically do a card w/anything that comes off a spool. Easy enough! :)

So, here's my card. I used the music note stamp and embossed it w/gold powder. Then, I stamped the Christmas ornaments (these are clear stamps that are part of a holiday set. Bought them at a scrapbooking show, though, and can't find the company's name--sorry!). I cut them out, embossed them also, and colored in portions of 'em. Then I tied some gold twine to attach the ornaments and I was done! Mounted it on some red cardstock and I love the look of the card. Makes me think of singing Christmas carols, that's for sure!


If you want to play along, check them out at: http://ribboncarouselchallenge.blogspot.com/

Thanks for stopping by...and for the sweet comments people have been leaving, too! They sure do make me smile!

Friday, July 15, 2011

Thinking of you

There's nothing like chatting w/an old friend over the phone. I have a friend that moved about 6 hours away and we had the chance to catch up the other day. I hung up and realized just how much I miss her. I miss her being around. I miss seeing her playing w/my kids. Funny how emotions come up after chatting w/loved ones.

So, I decided to make a card for my friend. To be honest, my son had written a very special note to her and I thought it was the perfect excuse to also tell her how much I miss her.

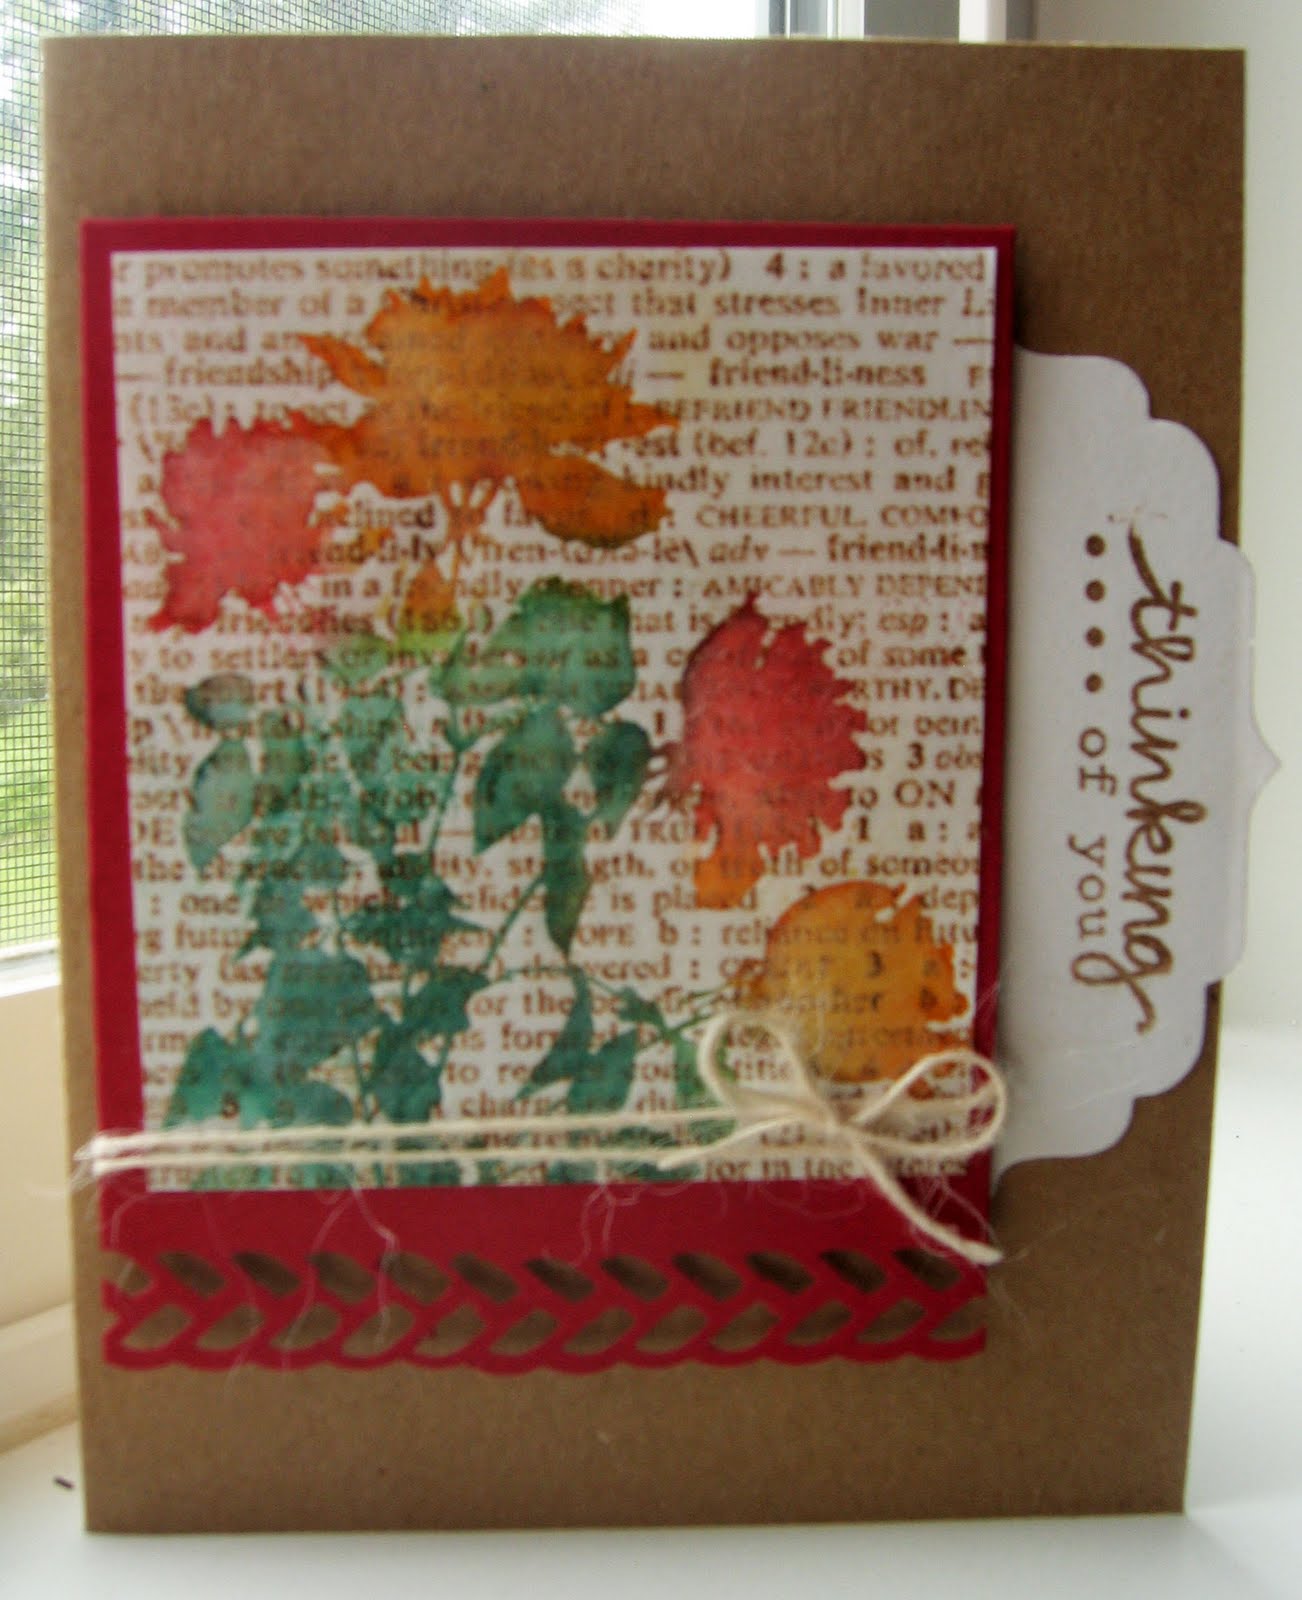
I love using reverse image stamps. First, though, I took a definition stamp and stamped the white cardstock w/it. Then the fun begins! I love embossing the reversed stamped image and then using distress inks to color the image in--so easy and fun! I mounted the image on a piece of red cardstock which had been punched w/a braid punch. Then, I added a bit of twine to finish off the card and the sentiment was placed on 1/2 a label. Voila! :)

Wednesday, July 13, 2011

A lesson learned

I ran across this card today and just had to chuckle. It's a Valentine's Day card that I made for one of my boys. I had been working on a card for my husband and showed the card to my boys. The oldest immediately said, "where's mine?!" I didn't think he was serious. But he was! He kept asking me for his card. And he was adamant that it had to be special...Well, I didn't have much of a choice. It was time to work on a card for my son...and, truth be told, why not? I love him, too! Why not take some time to work on a card for him? So, here's the final card...It was simple--but it made him smile and that was worth the time it took!

Lesson learned...it doesn't take much to make people smile...

Wednesday, June 29, 2011

Anniversary card

June 28th isn't just my b-day. It's also my wedding anniversary...and we purposely chose that date for many reasons. The biggest reason, however, being that the love I share w/my DH is the best gift of my life...hence I always remember my greatest gift on my b-day! :) Figured since my anniversary just passed that I would share a card I gave to my DH.

Thanks for stopping by!